How to Get Windows Wallpapers for your Chromebook

While everyone wants to own a decent collection of wallpapers, it can be a headache trying to find them.

But there are time-saving options such as Google’s own Art Project or Bing’s Image of the day as your very own wallpaper.

It must be pointed out that these apps are easy to use. Just look them up at the Chrome Web Store and install them.

Google’s Art Project will place images of art from this project and which is part of the Google Cultural Institute. This institute has been known for digitizing paintings and other images from public galleries. You can find a number of these images on that app or just check notifications for more information. Also, you can just look at the Google Art Project archives that is completely available online.

 mysystemjournal1Now, even if not everyone wants to use Bing, there is a new beautiful homepage every day. It’s fine to skip Bing but you’ll have to install the Bing Wallpaper for Chromebook app. Best part: once you do this, the app will send new images everyday to your desktop.

What is also clear is that Microsoft puts a lot of effort into these images. In fact, Windows users can use Microsoft’s Bing desktop application to get new, updated images every day.

Now, there’s a reason why these apps work only for a Chromebook. This is because of a Chrome wallpaper API that was added as a part of Chrome OS 33. Also, it is far more secure than Windows where you only have to allow it to change the wallpaper settings every day.

Apart from this, you can also use Chrome extensions that can change the wallpaper in your tabs too. Without a doubt, they will work on Mac, Windows and Linux.

How to Chat with Someone Who Doesn’t Have a Skype Account

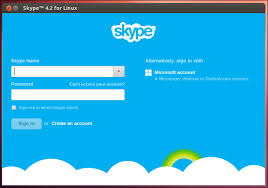
Microsoft has recently added a new feature that allows you to chat with anyone without Skype.

You don’t have to be a regular Skype user either. Of course, not very many people do not have a Skype account. But it is still a good feature to have.

This new feature is available for users in the United States but it has to be activated first.

Here are the instructions for the desktop version of Skype:

The first thing that you have to do is select a contact from your list and double-click to open a chat window. At the top-right, click the contact button. Now select another contact and then select create group.

 mysystemjournal4Now, click the add contact button which will throw up a message at the bottom of the add contact drop down and which reads, “Anyone else?”

 After this, turn on “Make a link for people to join” so as to get a link from the profile that you can share with other people. Now, click ‘profile’ as this will open a new window.

The final step includes scrolling down to ‘Administrator settings’ that is located on the right-hand side. Now, click the checkbox which is right next to “Make a link for anyone to join”.

The link will appear right below that and also if you click the “add contact” button in a group conversation. Of course, this only needs to be done just once and then the feature will be found across all conversations.

Also, people without this link will be able to access it via Skype for the Web. For mobile users, you need both Skype account and the app.

How to Block the Windows 10 Upgrade

With a number of users complaining about Windows 10 running the installation automatically, some people have gone as far as refusing to boot their Windows system.

One expert in particular was asked to shut down his system for an update but this did not happen. Of course, when it asked him to shut his system down again.

So, if the Get Windows 10 icon has become an annoyance, the first thing that you should do is remove it with Ultimate Outsider’s free GWX Control Panel. In fact, you can easily download it as an EXE file. This will help you to block the Windows 10 upgrade.

 mysystemjournal3

Now, once you’ve installed, look at the upper portion of the program as it will tell you if the Get Windows 10 app and upgrades have been enabled or not.

All you have to do is click two of the buttons near the bottom such as the Disable Get Windows 10 app and Disable Operating System Upgrades in Windows Update.

Of course, you won’t be able to do this if the upgrade has already begun, then you’re stuck with it, as the expert mentioned above discovered.

Also, if Windows Update is failing to install Windows 10, then run Windows Update Troubleshooter once you have run GWX. Once you do this, launch and run the wizard and check for errors.

Now, wait for the system to fix all troubleshooting errors and which in the case where your Windows 10 update has failed will remove the Update Shut Down button.

After that, whichever version of Windows you’ve been using will resume services as normal.

3 IoT devices That Can Help You At Work

With the entry of consumer-level gadgets in the workspace, technology has become fun to use.

Of course, smartphone and tablets aren’t the only devices that can help you become productive. There are a number of wearables and Internet of Things gadgets that simplify a number of other tasks too.

Here are 3 IoT devices that can help you at work:

1: Smart Locks

You can keep your business secure with this device which is not very different from key card systems that corporations use. These locks connect to the internet via your office’s Wi-Fi and can be used either with a smartphone or otherwise. A number of options are available such as Samsung’s SmartThings, Apple’s HomeKit, Wink, Nest, August SmartLock and Kwikset Kevo. Just one app should be enough to handle your entire locking system.

 mysystemjournal42: The Smart Receptionist

While smart locks help you unlock your door remotely, a smart doorbell will help you see who’s at the door. The Ring doorbell, for example, sends you a message if the main door to your office is locked. Also, they send you a photo of the visitor especially if you’re busy in a meeting. Depending on this, you can decide to let them in or otherwise. This doorbell also comes with intercom facilities that will help you to talk to your guest if necessary. Better still, you can have motion sensors as well as the ability to monitor the outside of your property if required too.

3: Sales

There are options for those who sell goods or service and accept payment with a credit card. For this, credit card readers that can connect to your smartphone will help you save on POS rentals as well as credit card processing fees. Square and Intuit offer these solutions that are well worth considering.

4 Ways to Deal With A HTTPS Error Message

There are times when using our PCs, an error message saying that theHTTPS secure Internet connection has failed.

You might wonder whether this message is serious. Hardly. It’s a common error message that we all get, actually.

Here are 4 ways to deal with this HTTPS error:

1: Reboot

Probably the first thing that you should do when you see an error message such as this one is to reboot the system. If that doesn’t fix it, then you should move on.

mysystemjournal3 2: Check the system time

Now, check the system time on your PC. If it is incorrect, then the date and time on the SSL certificate on the server will not match up with the time on your PC. To fix this, access the Date and time settings located at the bottom when you select the time in your taskbar. If Windows is setting the time automatically and it is still wrong, then turn that option off. Click Change time and date manually.

3: Are you not at home?

One suggestion that Google Support state is that if this is happening on public Wi-Fi, then you might have to log in again through the network’s splash page. In other words, visit a non-HTTPS site and check to see if you end up having to agree with the site’s terms and conditions prior to accessing the Internet.

4: Run a complete antivirus scan

Do not run a quick system scan but a long, complete one. This might be taking place because of malware or viruses too. If you have an antivirus program that checks your network connection security, such as Avast Free Antivirus, then run that as well.

How to Change Your Windows Admin Password in Windows 7, 8 and 10

It doesn’t matter if you have forgotten your Windows password. You can still log in even if there isn’t any other administrative account on the PC.

This might seem a bit scary from an administrative point-of-view but there are good reasons to use these tricks. Of course, what this also points to is the need for encrypting sensitive files.

Let’s look at the instructions for both Windows 7, 8 and 10:

 mysystemjournal2Windows 7:

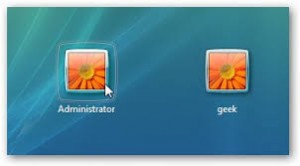
For this, you will need a System Repair disc. You can even use one from someone else’s PC provided that one isn’t 32-bit and yours is 64-bit or vice-versa. So, to change the password, boot from the System Repair Disc. Press any key when prompted so as to reach the System Recovery Options screen. Check the location of the operating system be it C:, D: or otherwise. Hit Next. Select Command Prompt at the next screen.

Now enter each of the following commands and hit Enter:

x:

cd windows\system32

ren utilman.exe utilhold.exe

copy cmd.exe utilman.exe

exit

Now, remove the disc and reboot. Now, click the Ease of Access icon in the bottom left-hand corner to bring up the command prompt. Now type “net user username password” with username being the current one as well as the new password you want.

Finally, close the command prompt and log in with your new password.

Windows 8 (and 10)

Since your Windows 10 user account is linked with your online Microsoft account, this makes the process of replacing your password so much easier and secure.

For this, use another computer and go to Microsoft’s sign-in page. Click ‘Can’t access your account’. Of course, you’ll have to prove that you are the owner of this account based on the phone numbers and answers that you’ve provided before. You should be able to change the password easily.

Now, if you’ve created a local account, you’ll have to boot from the Windows 10 Recovery Drive. Also, the Ease of Access icon is located between the Power and Connect to Internet icons – in the lower right-hand corner.

3 Tools to Help With Email Productivity

Email usually makes the idea of a productive workday difficult. Yet it doesn’t have to be this way since Gmail has a number of built-in features apart from third-party tools that can change this.

Here are 3 tools that you should start using with your Gmail account as soon as possible:

 mysystemjournal11: Unroll.me

Signing up for subscription offers, newsletters and daily deals usually results in your inbox overflowing with spam. Using Unroll.me can change all of that in a hurry. When you connect your Gmail account to this service, it will scan for subscriptions and compile the senders into a list. Now, click the Unsubscribe button next to each sender to get rid of subscriptions you don’t want.

2: Rapportive

If you’re one to receive a lot of emails from a number of people, turning to Google to find out more information about them is the next step. This tool built by LinkedIn will help you to find that information without having to search for it. One excellent aspect of using this tool is that it replaces Gmail’s sidebar ads while offering you emails with detailed information about the sender of an email.

3: Todoist

What this tool helps you to is process your emails much faster by turning them into task list items. Integrating this popular to-do tool with Gmail will help you clear up your inbox as much as possible by prioritizing email as well as assigning deadlines and reminders too. Best part about using this app is that it syncs across all devices so you can clear out your inbox regardless of the device that you use.

How To Make The Cursor or Mouse Pointer More Visible

If you can’t see the mouse pointer when you move the mouse around, then it’s time change how the pointer looks and behaves.

Of course, the simplest way to do this is by making these changes through the Control Panel’s Mouse tool.

As you should know, there are different procedures for each version of Windows.

Let’s look at these procedures for Windows 7,8 and 10:

 mysystemsjournal3Windows 7: This method is the simplest of the lot. First, click Start, select Mouse in the Control Panel section. Now, make the changes necessary.

Windows 8: Go to the Charm bar,type ‘mouse’ in the text box. Select the option that says Mouse. Avoid the Ease of Access mouse settings. It doesn’t have as many options as the Control Panel tool.

Windows 10: For this, type Mouse in the search field. Now select ‘Change your mouse settings’. After this, click ‘Additional mouse settings’ in the Settings app.

Regardless of whichever version of Windows you use, you should be in the Mouse properties dialog box.

Now select the Pointers tab and the Scheme menu and pick something. There will be a variety of colors, schemes and fonts to select from.

When you pick one scheme, it won’t change the mouse pointer but will display your selection in the box to the right of the Scheme menu.

If you want to see how the mouse pointer actually looks, then click Apply.

Also look at the Pointer Options tab as you will find more possibilities there to make your mouse pointer visible.

What You Need To Do When Your Windows Backup Fails

There’s a reason why experts recommend two backups instead of one. This is because there’s always a chance of that backup that you created not working at all.

However, there is a fix for this problem and in particular for image backups.

But first: what is an image backup?

Simply put, it is able to copy an entire partition or drive into one large file.

 mysystemsjournal2While you can use it to backup documents and other files, you can literally back Windows and all your installed programs as well.

Even then, your data is usually more about important. Installing Windows is always a possibility as being able to retrieve your child’s pictures or that quarterly report you saved.

If you have backup either locally or in the cloud, then you can restore that. Or else, if you use OneDrive or Dropbox, then you obtain at least some of your files from there as well.

The next option is to mount your image backup as a drive. Most backup programs give you the option to do this.

All you have to do is double-click the backup file on your computer where your backup program has been installed.

If it isn’t completely corrupted, then it should appear in Windows as a virtual partition. You can then copy and paste files to another drive as a result.

This also works with Windows backup files as well. If you are using the WindowsImageBackup folder, you’ll find the files there as well. However, you have to access each folder in order to obtain VHDX file.

This is no different with Windows 7.

Now if these tips don’t work, the other option is to buy an external drive while attempting to recover the entire drive to it.

If this works, then try cloning it to the internal drive. Or try the restoration on another computer. But it will have to be an external drive.

Finally, if this doesn’t work then use HDDScan to run a diagnosis on the backup drive.

How to Search With Google When Using Cortana

If you launch a web search from Cortana, it uses the Bing search engine and not Google.

So, what if you’d like to use Google for web search instead?

Of course, there’s a perfectly good reason for this – Cortana’s “brains” are powered by Bing, so a multi-engine search is not possible.

For some users, this should be enough especially if they need help with simple tasks such as checking the weather, solving math problems or even tracking flights. But when it comes to search engine results, most people still prefer Google to Bing, quite honestly.

 mysystemsjournalYet there are ways by which you can redirect your search but it will only work with Firefox or Bing.

Before we look at how this possible, it must be said that this will not be possible with Microsoft Edge, Internet Explorer or Opera.

(Also, if you don’t care about Google, then these solutions should work with DuckDuckGo and Yahoo too.)

Now, using Firefox is the easiest way access Google Search. There’s no need for add-ons either. Simply download the latest version of Firefox and set it as your default search engine. Cortana will follow suit if you’ve not used it before.

In fact, by default, Cortana will open Yahoo. Change that by clicking on the magnifying glass icon in the search bar.

Alternatively, for Chrome, you can use an add-on such as Chrometana. Once you’ve downloaded this, go to Extensions and look Chrometana. Click Options. Pick either Google, DuckDuckGo or Yahoo and close the tab.

You’re all set to use Google as your default search engine.