How to Stop HTML5 Video Autoplay in Chrome and FireFox

Visiting a web page can be irritating given that there are videos that play automatically. Flash videos are one type while there’s another: HTML5.

No matter the type, they can both be just as annoying and should be blocked if you intend to not be interrupted. If you use either Chrome or Firefox or both, it’s easier than you think. That said, there still isn’t a fix for this when you use Internet Explorer.

Here’s how you stop autoplaying HTML5 videos:

mysystemjournal21: Chrome

First, you need to download and install a Chrome extension known as Stop YouTube HTML5 Autoplay. This is an extension developed by Port Zero. If you can’t download the file, then go to the developer’s site. It must be pointed out that even non-YouTube HTML5 videos will be blocked.

The program is excellent and works very well. Just install and enable it and the videos won’t start automatically. Of course, you can click the video to get it going.

2: Firefox

If you use Firefox, you don’t need an add-in or extension to enable this. First, open a Firefox tab or window. In the address field, type “about:config”. After this, click the “I’ll be careful, I promise” button. A long list of settings is thrown up. You’ll find a search field above it. Enter the word ‘autoplay’ and hit Enter. One entry is thrown up: media.autoplay.enabled.

Look for the Value column. Now double-click the entry. The Value will change to False. After this, the next time you visit a web page with videos, an image will come in place of the video itself. It won’t start until you want it to either.


What You Need to Know About Running Android Apps on Windows

Android and Windows are very different operating systems. This is why programs on one system will not work on another.

For this, using an Android Virtual PC on your system is advised. But it can be a real challenge setting it up.

That said, there’s an easy work around this problem in the form of the American Megatrends’ AMIDuOS. This program is based on the popular technology used by VirtualBox. So, it offers one a virtual Android machine in a pre-conformed package.

mysystemjournal1Quite oddly, AMI seems to be confused with what to call this program. When used for Windows, it calls itself DuOS. On the website, it is called AMIDuOS.

(This sounds very similar to the Baroque composer known as Wolfgang Amadeus Mozart but the resemblance was unintentional, of course)

Now you can run AMIDuOS (and Android programs) either in Full Screen or in a new window. Experts recommend the Normal Screen Settings that can be changed using the DuOS Configuration Tool.

The reason for this is it fills the entire screen but still makes room for the Windows Exit and Minimize Icons. Additional settings will enable you to use your Windows libraries in Android. You can root and unroot your virtual device too.

That said, both these operating systems will play well together. You can even copy-paste from one to the other. But the usual Ctrl-C and Ctrl-V doesn’t work.

As for its costs, you can use AMIDuOS for a duration of 30 days at no cost. After this, you’ll have to pay $10 to use AMIDuOS. Since it is tied into your Google account, you can log on and actually install it on as many PCs as possible.

IT Training Is More Important than Ever

Written by Brand College

It’s no secret that the last seven years or so have not been great for our economy. Many people are still worried that we’re not actually out of it yet and that the next handful could be just as bad. Whatever the case, you still need a job. Hopefully, the recession has also made it clear that you need a job which will actually deliver a sufficient paycheck and that this means one you can depend on for the foreseeable future. Whether you don’t have a degree or the one you currently have isn’t working, consider getting into information technology training in Los Angeles.

There are countless ways you could do this. Right now, for example, Cisco training in Los Angeles is very popular. Learning about information services, software design and server management are all great options too.

The point is that you want your paycheck to be tied to the digital world. It clearly isn’t going anywhere any time soon. If anything, it’s getting more and more important. With the right training, you could land a job practically anywhere in the world.

For that, consider Brand College. It’s located at 529 Hahn Ave. Suite 101, Glendale, CA 91203-1052, so just a stone’s throw from LA. They have a history that shows they understand this important field and know how to pass it on to others too.

 ——————————————————————————

Are you hoping to take a plus training Los Angeles? If so, you can do much better than entrusting Brand College with your needs. Their reputation and staff speak for themselves.

How to Mute Noisy Chrome Tabs With Just One Click

When you have a number of tabs open and a number of them are playing audio or video, it would be hard to tell which one is playing what.

Which brings us to the volume indicator which was old news in 2014. However, in 2015, Google gives users the ability to mute noisy tabs with only one click.

With this feature, you don’t have to scroll from page to page, or find the audio or video to stop it. Now, all you have to do is click the speaker icon located in the tab so as to silence the any noisy tab that you cannot find.

mysystemjournal4Now, since the feature is still a work-in-progress, the only way to get it started is by enabling a Chrome flag to get it started.

The first thing that you need to do is enter chrome://flags in the Chrome address bar. Now hit Ctrl+F so as to open the Search function and then type “Enable tab audio muting UI control” in the text entry box that appears in the upper-right corner.

This search will then bring you to the hidden feature where you can click the Enable link and then close the tab. Once this is done, reboot Chrome so as to get the feature working.

Now, click the upward-facing arrow in the system tray and which is located on the far-right hand side of the taskbar. After this, right-click the Chrome icon and then select Exit.

Once Chrome disappear from the system tray, open the browser again and test the feature by opening YouTube on one tab and a news site on another. Once the video starts playing, you can click the “Volume” icon if you want to mute it. To re-enable sound, click the icon again.

How to Enable Distill – Chrome’s Reader Mode

A number of browsers has had this feature for several years now. However, Chrome has finally caught up by adding a “Reader mode” that will break down an article into its text and images so as to make it much easier to read.

The new feature known as Distill which might be a work-in-progress is still worth trying out for those who use Chrome a lot.

However, in order to use Distill, there are a few steps that you will need to carry out. Firstly, you have to pin Distill to your taskbar. Of course, a desktop shortcut should also work.

mysystemjournal3If you haven’t done this yet, right-click on Chrome’s icon and click “Pin this program to the taskbar”. Now close Chrome via the taskbar where you right-click the Chrome icon and then click Exit.

Once this is done, right-click the Chrome icon in the taskbar while highlighting Google Chrome as a result. Now, right-click Google Chrome again and then select Properties.

With this, a Properties window now opens. Under the Shortcut tab, you’ll see a label titled ‘Target’ along with a text-entry box. Now place the cursor after the last quotation mark and type: –enable-dom-distiller.

Click Apply and then OK after that.

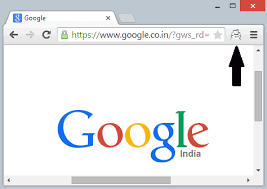
After this, open Chrome and select the ‘hamburger’ icon on the upper right side where a new option that says “Distill page” should be displayed.

All you have to do is select “Distill” when you are viewing an article and this will make your reading a whole lot easier.

One thing you must know is that this feature is a simple one and does not have anything fancy.

Alternatively, there are extensions from the Chrome Web Store such as Clearly that offers the same feature as Distill.

3 Ways By Which Android Tracks Your Activity

There are a number of ways your Android device tracks your activity. Whether or not you find that to be creepy depends on how paranoid you really are.

Of course, Google does this so as to generate search results that might be most suited to your needs. Even though the company says that only you can access your browsing history, it’s still a good idea to think about knowing how Android tracks your activity.

Having said, here are 3 ways by which you Android tracks your activity:

#1: Web History

Google keeps track of your searches whenever you use Chrome from any device so as to make your search results far more relevant. In order delete your web history, open the Applications drawer and the Google Settings. Now tap Account History, Web & App Activity and Manage History buttons. You can either turn on the Private Browsing feature in Chrome or use the Search box and Remove Items button accordingly to delete your search history. You also have an option to put your entire web history on pause so that Google doesn’t save your searches. This is done by unselecting the On setting on top of the Web & App Activity screen.

mysystemjournal2#2: Location

If you give Google the green signal, Android will keep track of the location of your tablet or other devices and which is done by pinging its servers from time to time. This can happen even if you aren’t actively using these devices.

To remove it, go to Google Location History and uncheck all devices whose location you do not want to share. Tap Delete Location History to wipe your location history completely.

#3: YouTube Browsing

Your YouTube searches are usually saved so as to offer recommendations and better search results in the future. Now you can either remove an individual search or all of it. For this, go to Account Activity screen and YouTube Search History as well as Manage History. As mentioned earlier, to remove individual search from the list, tap the three-dot menu button and then, Remove from Search History. As for deleting the entire list, tap the Clear all Search history button.

How to Install a Graphics Card

Installing a new graphics card can really give your PC a boost when it comes to playing even the most visually demanding games that you might want to play.

However, finding the right graphics card (mostly from companies such as Nvidia or AMD) is very important considering how many there are. The budgets also range from below $100 to above $1000.

mysystemjournalWhile it will be ideal to find the right graphics card that gives you most bang for your buck, it’s also important to consider a card’s heat, noise and power consumption. Of course, it’s important to check whether your PC has the right hardware to support your new card.

The most common problem that you might have is with the right power supply especially if it is multi-card configuration. Finally, the last thing that you must think about is whether there is enough space in your PC for the graphics card of your choice.

Now, installing a new graphics card is pretty simple. All you need is your PC, graphics card and a Phillips-head screwdriver. Make sure you turn off your PC and unplug it before you start the installation.

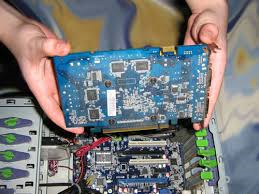
First, you have to remove the casing and then find the graphics card so as to remove it. If there’s isn’t one, then it’s time to locate the PCI-E x16 slot which is closest to the heat sink of the processor and which will either be the first or second expansion slot on your motherboard.

If you’re replacing an existing graphics card, remove any cables, loose wires as well as the existing screws from its retention bracket and the old graphics card and replace it with the new one. Use screws to hold the graphic card’s retention bracket to the your computer’s casing.

Also, you might need to add additional connectors and which is where connecting PCI-E cables will not work without that extra power and your PC might not be able to boot.

Discovering New Cures for Age Old Diseases

Cancer has been a problem humans have been dealing with for ages, and it’s a continual thorn in our collective side. It’s a disease with a high mortality rate, and we understand a lot about what it does but not how to stop that process. While medical science works hard on cracking that puzzle, we’ve made progress on other diseases that have been problems for ages.

Understanding Disease

HPLC purification is a crucial process in forensic science, telling us more about how a disease has affected someone on a molecular level. We can use this process to test reactions of potentially harmful toxins, in order to isolate exactly how a disease affects the body. Once the reaction is observed, and repeated, it becomes something scientists can test for.

Understanding what a disease does is the first step in curing, killing or deactivating it.

How Cures Work

Going deeper, we can even use these synthetic strands to test for the presence of something. Phosphorothioate oligonucleotides, for instance, are “anti-sense” particles used in genetic therapy. These drugs basically deactivate whatever strand of DNA would otherwise cause the harmful genetic disorder to crop up.

We can also test for these chemicals and toxins in real-time, which means a diagnosis is much faster than it was even ten or twenty years ago. That’s made a significant difference in response times and diagnoses for patients in places like Africa, a region beset with malaria outbreaks. Testing has sped up results and that means doctors have more time to prescribe life saving medication to patients. The costs are also lower, so testing is feasible in poorer nations.


Bio: The Midland Certified Reagent Company can manufacture phosphorotioate oligonucleotides, as well as purification modalities used in a variety of testing processes.

2 Ways to Check if a Website is Down

Using the Internet can work out to be a great book but there are times when it isn’t – when you connection is down, of course. While there are easy fixes that one can opt for, there are other times when it isn’t and where access to your favorite sites is completely shut off.

There are only two scenarios that can result from such a situation: either the problem is with the site or your internet connection.

So, in order to figure out whether the problem is with you or the site, here’s what you can do:

#1: Use isup.me

One of the simplest things that you can do is visit a site: http//isup.me to check whether a site is truly down or is it because of your internet connection. Enter the address of the site you want to check and hit the Enter key. In a few seconds, you’ll find out whether the site is down and the problem is happening only with ‘just you’ or it’s ‘not just you’.

#2: Use the command line program Ping

Another way to check this is by using the command line program Ping. All you have to do is open the command line and type “ping www.facebook.com” if you are checking for whether Facebook is up or not. Enter any other site’s address in place of Facebook here to do the same. Enter the “www” and hit the Enter key. If you see four lines with “Reply from…”, then the site is working. If you see the message“Request timed out”, then the site is down. Also, remember that some sites refuse pings with a couple of examples being Amazon and PCWorld.

Steps to Resolving Slow Performance With Your PC

There are a number of reasons why your system can slow down. Probably the fastest and simplest way by which you can solve this is by rebooting your system first.

A number of people actually use their PC 24/7 and put them in sleep or hibernation mode instead of shutting them down completely. A simple reboot in this case can also clean out these so-called temporary cobwebs, if you will.

If you have rebooted and your system continues to run slow, then the next step would be to ask yourself what was changed recently, when it comes to your PC.

If there was a new program or hardware installed or even the driver was updated, it would be a good idea to undo what you just did.

For uninstalling a program, you can use the Programs and Features tool in Control Panel while selecting the Roll Back Driver option in the Drivers tab found in Device Manager. Similarly for new hardware that has been added, go to Device Manager and right-click it and select Uninstall to complete the process.

Of course, if none of these actions has influenced the speed of your system then it is time to check whether an overly large memory is taking up a lot of resources from the CPU or memory.

Open Task Manager and look at the Processes tab which contains both the CPU and Memory columns. You should be able to find a program that is taking up resources and close it in Task Manager itself.

Of course, this is only a temporary fix and one must uninstall the program next and so to ensure that your system doesn’t slow down the next time around.

Finally, while malware might rarely cause your system to slow down and for this you can use software that searches for malware so as to resolve the problem.